Why Buy When You Can DIY?
Listen, I get it—composting sounds like one of those things that requires a homestead, a straw hat, and a borderline concerning enthusiasm for organic matter. But trust me, it’s way easier (and way less weird) than it sounds. Making your own compost bin saves money, reduces waste, and gives your garden the kind of nutrient-rich soil that makes plants do a happy dance.
This guide is all about DIY compost bins that fit your life. Whether you’re a first-timer looking for an easy setup, an urban composter trying to keep things discreet, or you just want to outsmart the local raccoons who see your food scraps as an all-you-can-eat buffet—I’ve got you covered. We’ll be diving into beginner-friendly bins, animal-proof options, and creative designs using barrels, pallets, and more.
Personal confession: I was once that person who thought composting meant throwing food scraps in a pile and hoping for the best. Spoiler alert: That’s not how it works. After a few questionable-smelling experiments, I finally cracked the code—and now, my garden thanks me. If I can figure this out, so can you.
So grab a shovel (or, honestly, just a drill and some wood scraps), and let’s get your dream compost bin started!
Why Make Your Own Compost Bin?
Making your own compost bin isn’t just a “look how handy I am” flex (although, let’s be real, it does feel pretty good). It’s about saving money, reducing waste, and tailoring a bin that works for your space.
🔹 It’s ridiculously cost-effective. Store-bought compost bins can be absurdly expensive. Instead, why not upcycle some old wood, wire mesh, or even a sturdy plastic bin? Your wallet will thank you.
🔹 Custom fit for your space. Got a huge backyard? Build a three-bin pallet system. Working with a tiny apartment balcony? Try an under-sink vermicomposting drawer (yes, composting with worms indoors is a thing—and it’s way cooler than it sounds).
🔹 Control over design. Need something animal-proof to keep out nosy critters? Prefer a tumbler-style bin for easy turning? Want a rustic wooden setup that looks charming in your garden? You’re in charge.
If you’ve ever thought, “I’d love to compost, but I don’t have the space/time/patience,” this guide is here to prove you wrong (in the nicest way possible).
Choosing the Right DIY Compost Bin for You
Alright, so you’re on board with composting (high five!), but now comes the big question: What kind of bin is right for you? Do you want something low-maintenance or a high-effort, high-reward system? Something that sits still or spins like a rotisserie chicken? Let’s break it down.
Stationary Bins vs. Tumbler Bins: What’s Best for Your Space?
The battle of the bins. It’s like choosing between a trusty old-school bicycle and a fancy new electric scooter. Both get you where you need to go, but in totally different ways.
✔️ Stationary Bins – The composting equivalent of a slow cooker. You throw stuff in, turn it every once in a while, and let nature do its thing. Best for large gardens, people with patience, and anyone who wants a “set it and forget it” vibe.
✔️ Tumbler Bins – For the impatient composters of the world (no shame). These bins spin, aerate, and speed up the breakdown process. Great for small spaces, beginners, and anyone who secretly enjoys giving their compost a little spin like a game show wheel.
If you’re thinking, Okay but which one is better? The answer is: It depends. Got a big yard and lots of food scraps? A stationary bin is probably your best bet. Short on space and want compost fast? A tumbler is your new best friend.
Materials to Consider: Pros and Cons of Each
Not all compost bins are built the same. Some are rustic and charming, others look like they came straight from a sci-fi movie. Here’s what you’re working with.
Wood (Pallets, Slats, or Planks)
- Pros: Looks gorgeous in a garden, cheap if using reclaimed wood, breathable for good airflow.
- Cons: Can break down over time. Also, termites exist and they’re little jerks.
Plastic Barrels or Bins
- Pros: Lightweight, easy to DIY into a tumbler, holds moisture well.
- Cons: Less breathable, might not be the cutest thing in your yard.
Wire Mesh or Hardware Cloth
- Pros: Super breathable, great for fast composting, easy to shape into a bin.
- Cons: Not the most animal-proof option unless reinforced.
Upcycled Random Stuff
- Pros: Free. Eco-friendly. Makes you feel like an absolute genius.
- Cons: Durability is a mystery. Also, explaining to your neighbors why you have an old dresser filled with food scraps might get you some looks.
How Much Compost Do You Need?
Bigger isn’t always better (but sometimes it is). Think about how much food waste you produce and how big your garden is.
- Small backyard or patio garden? A compact tumbler or under-sink vermicomposting drawer is plenty.
- Medium-sized garden? A simple pallet bin or plastic barrel system works great.
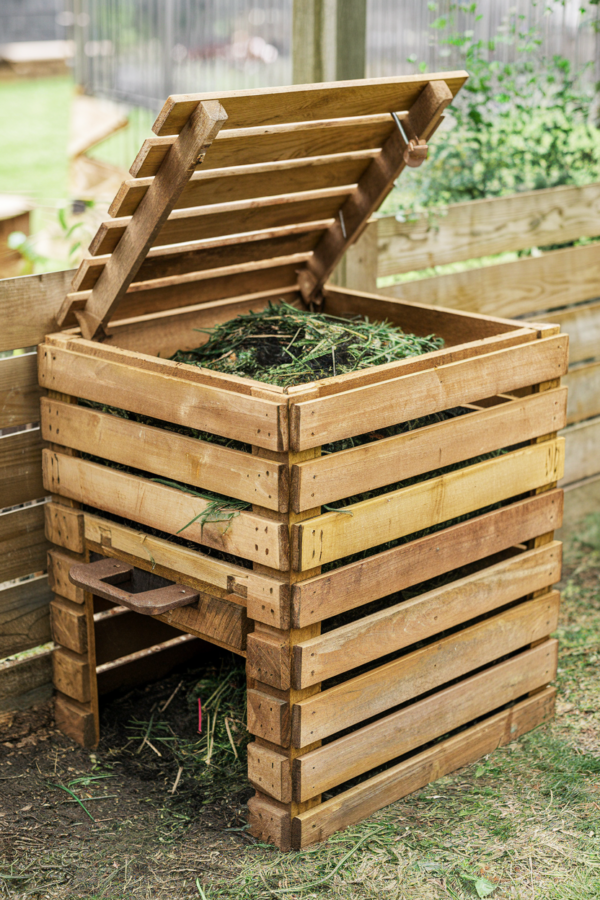
- Large vegetable garden or farm vibes? Go big with a multi-bin setup or a rustic wooden compost station with hinged lids and easy access panels.
If you’re still unsure, start small. Composting is kind of like adopting a pet—you can always expand once you know what you’re getting into.
Up next, we’ll get into the best DIY compost bin ideas—easy builds, budget-friendly hacks, and tried-and-true methods to keep your compost happy.
Easy DIY Compost Bins (Step-by-Step)
So, you’re ready to get your hands dirty. Good news. Building your own compost bin is way easier than you think. You don’t need to be a carpenter or a composting wizard. Just pick a style that works for you, grab a few basic materials, and let’s get that future black gold cooking.
A. Beginner-Friendly Compost Bin (No Tools Needed)
This is the “I just want to try composting without making a life commitment” option. It’s perfect if you’re short on space, time, or DIY enthusiasm.
What You’ll Need:
- A large plastic storage bin or trash can with a lid
- A drill (or a strong nail and some determination)
- A few handfuls of dry leaves or shredded paper
How to Make It:
- Grab your storage bin or trash can and drill small holes on the sides, bottom, and lid for airflow. Compost needs oxygen to break down properly.
- Place a thin layer of dry brown material (leaves, shredded newspaper, or even torn-up egg cartons) at the bottom.
- Start adding food scraps, alternating with more brown material.
- Keep the lid on to trap heat and moisture, but give it a shake or stir it occasionally to keep things moving.
This bin is great for beginners because it’s contained, requires minimal effort, and works in small spaces. Just avoid overloading it—too much moisture can make it a funky-smelling mess.
B. Animal-Proof Compost Bin (Critter-Resistant Design)
Some of us live in areas where raccoons think they pay rent and will absolutely treat your compost like a midnight buffet. If that sounds familiar, you need a bin that keeps the little bandits out.
What You’ll Need:
- A sturdy plastic or wooden bin with a tight-fitting lid
- Wire mesh or hardware cloth
- Bricks or a raised platform
How to Make It:
- Choose a bin with a secure lid. If it doesn’t lock, add a bungee cord to keep it from popping open.
- If using a wooden bin, line the bottom and sides with wire mesh to keep burrowing critters from sneaking in.
- Elevate the bin slightly on bricks or a wooden pallet. This keeps it dry and makes it harder for critters to climb inside.
- Make sure you’re composting correctly. Food scraps should be covered with dry brown material (leaves, sawdust, shredded paper) to reduce odors that attract animals.
If your compost still smells like a five-star buffet to local wildlife, skip meat and dairy scraps entirely. Also, citrus peels and coffee grounds tend to repel pests, so toss those in generously.
C. DIY Compost Bin from a Barrel (Rotating Tumbler Idea)
This one is for people who want compost fast and don’t love the idea of manually turning a pile. A tumbler-style bin speeds things up and keeps your compost neatly contained.
What You’ll Need:
- A 55-gallon plastic barrel with a lid
- A drill
- Two sturdy wooden beams or cinder blocks to raise the barrel
How to Make It:
- Drill holes all around the barrel for airflow. Compost needs to breathe to break down quickly.
- Mount the barrel on a frame made of wooden beams or place it on cinder blocks so it sits off the ground.
- Add your compost materials, making sure to balance greens (food scraps) and browns (leaves, paper).
- Roll or spin the barrel every few days to keep everything mixed and aerated.
A compost tumbler is perfect for people who want faster results with less maintenance. If you have a lot of kitchen scraps but don’t want to deal with a huge pile, this is a great option.
D. Pallet Compost Bin (Farm-Style & Budget-Friendly)
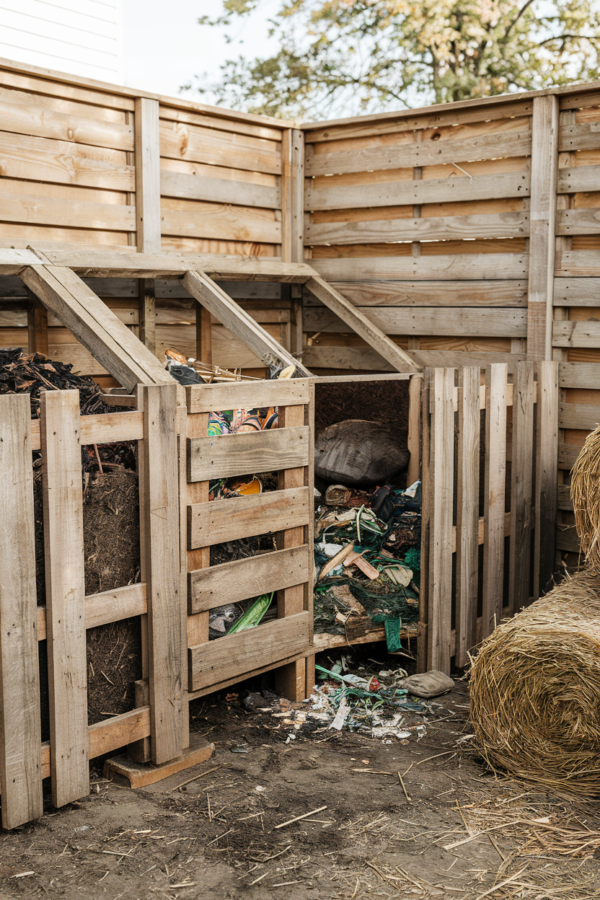
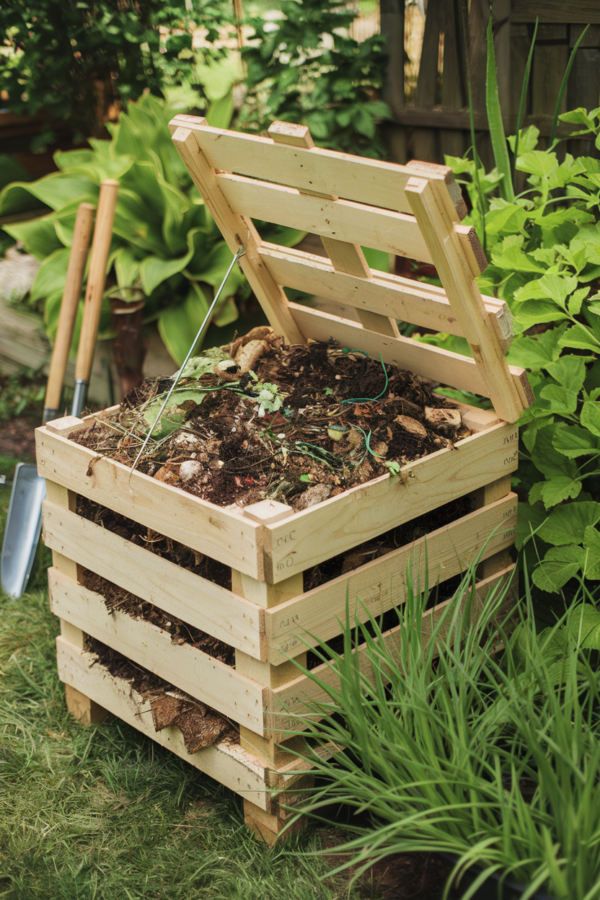
If you’ve got a big yard, a lot of leaves, and a pile of free wooden pallets, this setup is for you. It’s sturdy, holds a lot of compost, and looks great in a rustic garden setting.
What You’ll Need:
- Four wooden pallets (preferably heat-treated and chemical-free)
- Screws or nails
- A drill or hammer
- Hinges (if you want an easy-access panel)
How to Make It:
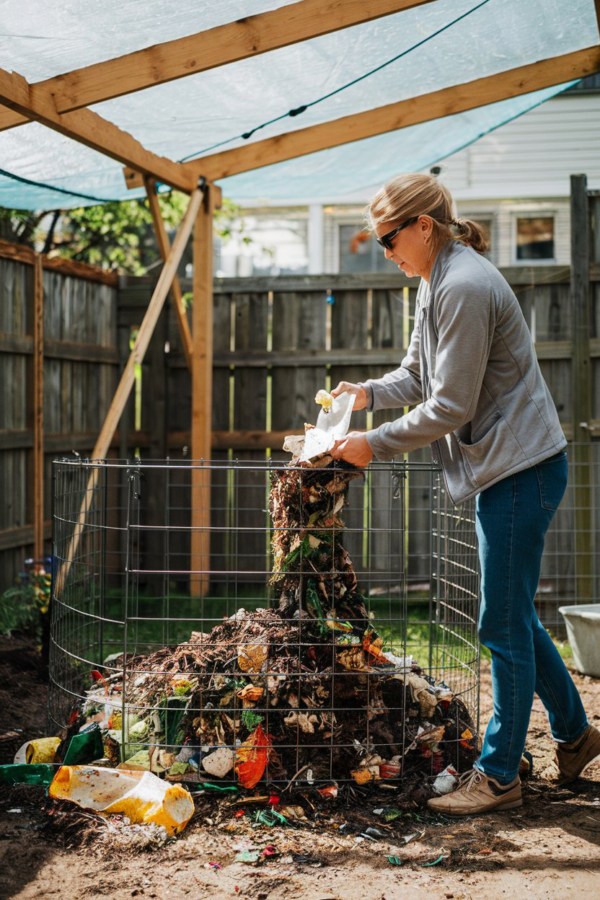
- Stand three pallets up in a U-shape and secure them together with screws or nails.
- Attach the fourth pallet as a front panel. Either leave it removable for easy access or add hinges to create a swinging door.
- Line the inside with wire mesh if you’re worried about critters.
- Start adding compost materials, layering greens and browns.
This bin is great for large compost heaps and keeps everything neat while still allowing good airflow. If you want an affordable, heavy-duty compost bin, you can’t go wrong with pallets.
Up next, we’ll talk about how to keep your compost healthy, balanced, and low-maintenance so you don’t end up with a slimy, smelly disaster.
Composting 101: How to Use Your DIY Bin
Building a compost bin is the easy part. Now, you’ve got to actually compost. That means knowing what to toss in, when to turn it, and how to avoid turning your bin into a moldy, fly-infested disaster.
Green vs. Brown Materials: A Simple Guide for Beginners
If composting had a rulebook, this would be the first page. You need the right mix of greens (nitrogen) and browns (carbon) for everything to break down properly. Too many greens? It gets wet and smelly. Too many browns? It dries out and takes forever.
✔️ Greens (Nitrogen-Rich, Fast to Break Down):
- Fruit and veggie scraps
- Coffee grounds
- Grass clippings
- Eggshells
- Manure from herbivores (not your cat. Trust me)
✔️ Browns (Carbon-Rich, Slower to Break Down):
- Dry leaves
- Shredded newspaper
- Sawdust (untreated wood only)
- Cardboard (no glossy coating)
- Straw or hay
A good rule of thumb is two to three parts brown to one part green. That balance keeps everything decomposing without the funk.
Turning and Maintaining Your Compost
Compost needs oxygen, just like a campfire. If you don’t turn it, it won’t break down properly. It’ll just sit there, soggy and sad, like an abandoned plate of salad in the fridge.
How often should you turn it? Depends on how fast you want results.
- Every few days: Speeds up decomposition, but requires commitment
- Once a week: The sweet spot for most backyard composters
- Once a month: Works, but expect a longer wait for finished compost
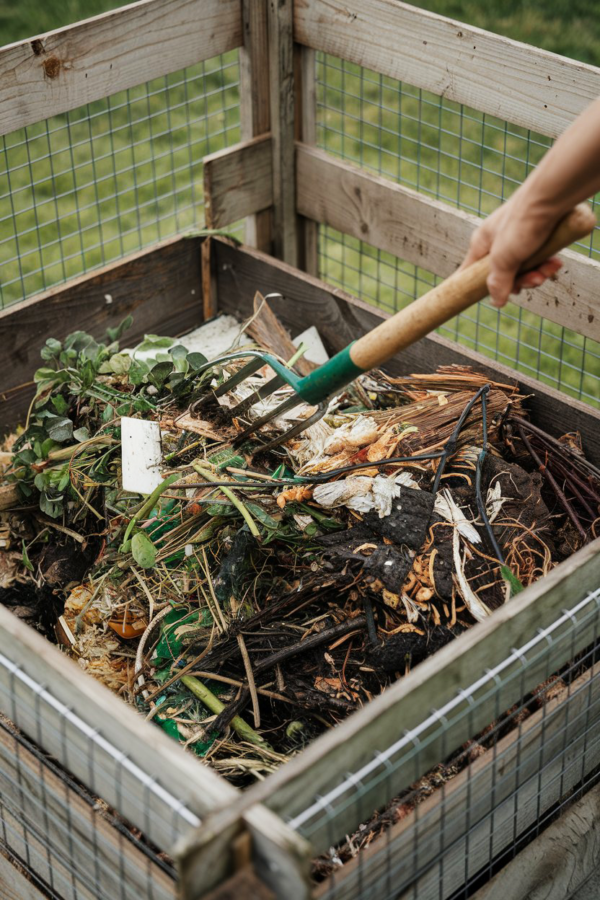
If you’re using a tumbler bin, just give it a spin. If it’s a stationary bin, grab a pitchfork or shovel and mix everything up. You’re just trying to fluff it up, aerate it, and evenly distribute moisture.
Common Composting Mistakes & How to Fix Them
❌ Smells awful? Probably too many greens. Add dry leaves or shredded newspaper to absorb moisture and balance it out.
❌ Not breaking down? Needs more greens and moisture. Give it a good mix and maybe a light watering.
❌ Attracting pests? No meat, dairy, or oily foods. Keep a lid on it, bury food scraps under dry material, and line the bottom with wire mesh if you’ve got digging critters.
Compost Bin DIY Ideas & Upgrades
Once you’ve got the basics down, it’s time for some compost bin glow-ups.
Two- or Three-Bin System: For Serious Composting
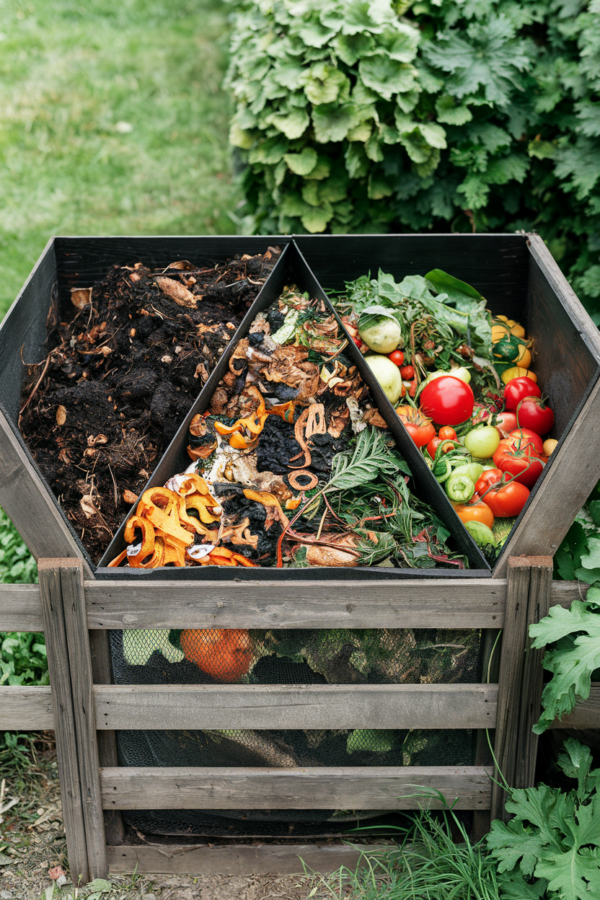
If you’ve got the space, a multi-bin system is the way to go. One bin for fresh scraps, one for mid-process compost, and one for finished compost. That way, you’re always cycling through stages and never running out.
Perfect for big gardens, farms, or anyone who has graduated from “hobby composter” to “compost enthusiast.”
Decorative & Hidden Bins: Compost That Blends In
Not a fan of the look of a giant bin full of rotting scraps? Disguise it.
- Use bamboo slats to build an attractive enclosure
- Tuck a pallet compost bin behind a garden shed
- Build a hinged wooden box that looks like a storage unit but secretly houses compost gold
Your garden stays beautiful. Your compost stays productive.
Adding a Lid, Wheels, or Handles: Easy Modifications
Making your bin more functional is just smart.
✔️ Lid: Keeps out rain, reduces smell, and deters animals
✔️ Wheels: Perfect for moving a tumbler bin around easily
✔️ Handles: Great for heavy lids or improving access
Even small tweaks can make composting easier and more enjoyable.
Conclusion
Composting is one of the easiest, most satisfying ways to reduce waste, improve your soil, and feel like an eco-genius. And making your own compost bin? Even better. It saves money, lets you customize the perfect setup, and keeps everything sustainable.
If you’ve been waiting for a sign to start composting, this is it. Pick a bin style, grab some scraps, and get composting today.
Got a compost bin setup you love? Have a weird composting hack that works like magic? Drop it in the comments. Let’s turn this into the ultimate composting inspiration hub.
FAQ
How do you make a simple compost bin?
You can make a simple compost bin using a plastic storage bin, a wooden pallet structure, or even a repurposed trash can. Just drill holes in the sides for airflow, place it in a shady spot, and start layering greens (food scraps) and browns (leaves, cardboard).
What is the first thing to put in a compost bin?
Start with a layer of browns, like dried leaves, shredded newspaper, or cardboard, to help with aeration and drainage. Then, add your first layer of greens, like fruit and veggie scraps.
What are the 3 parts you need to start compost?
- Browns (carbon) – dry leaves, cardboard, newspaper
- Greens (nitrogen) – food scraps, grass clippings, coffee grounds
- Moisture & Air – keep it damp (like a wrung-out sponge) and turn it regularly for aeration
Can I put moldy fruit in my compost?
Yes! Moldy fruit is perfectly fine to compost. The mold will break down naturally and help with decomposition. Just be sure to balance it with enough browns to keep your compost from getting too wet.


