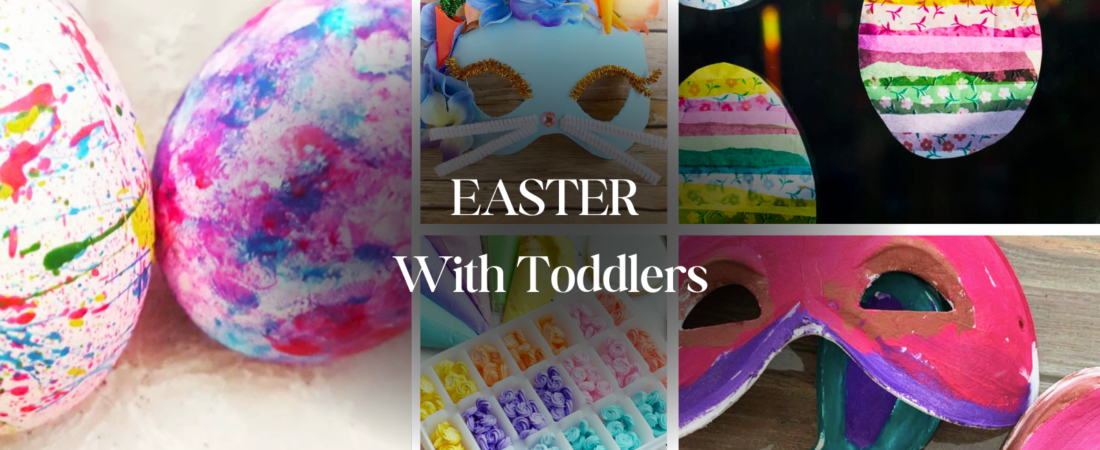
Easter is the perfect excuse to break out the craft supplies and get creative with your toddler. These easy, hands-on activities make the holiday extra special while keeping little hands busy and happy.
The best part? These ideas are super simple, budget-friendly, and use things you probably already have at home. No need for fancy supplies—just fun, laughter, and a whole lot of adorable Easter memories. Let’s make some magic!
Easter Egg Painting for Toddlers
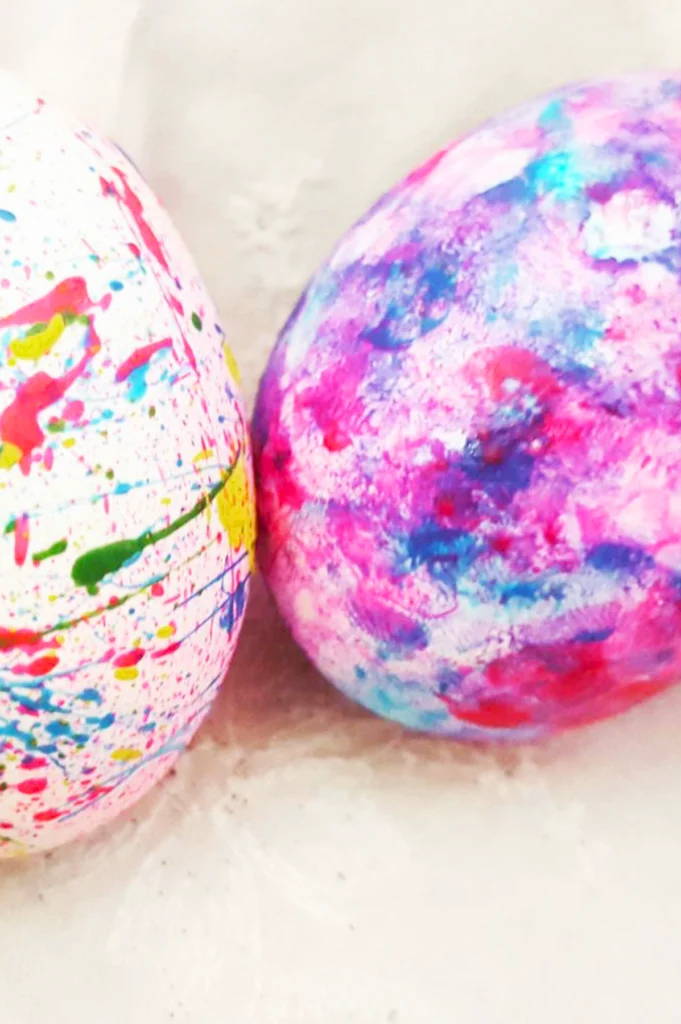
A classic for a reason! With a few smart tricks, egg painting can be toddler-friendly and (mostly) mess-free.
What You’ll Need
- Plastic or wooden eggs (less fragile than real eggs—trust me, it’s worth it)
- Washable paint (because toddlers and paint are a dangerous combo)
- Paintbrushes, sponges, or cotton swabs
- Aprons or old shirts (for obvious reasons)
- Muffin tin (perfect for organizing paint colors)
- Wax paper or an empty egg carton (for drying)
How to Do It
- Cover the table with a plastic tablecloth or an old sheet to keep things under control.
- Place the eggs in egg cups or a muffin tin so they don’t roll away mid-masterpiece.
- Pour washable paint into a muffin tin, using each section for a different color—easy to grab, no spills!
- Hand your toddler brushes, sponges, or cotton swabs and let them go wild. Encourage mixing colors, making polka dots, or even using their fingers (because you know they will).
- Once the eggs are decorated, set them aside to dry on wax paper or an egg carton.
Pro Tip
Keep baby wipes or a damp cloth within reach. Because no matter how much prep you do, at some point, your toddler will try to paint themselves instead of the egg. It’s inevitable. Just roll with it and enjoy the fun!
DIY Easter Bunny Ears with Toddlers
 DIY Easter Bunny Ears with Toddlers – Instagram Attribute: @hesterandcook

Nothing says Easter fun like a pair of homemade bunny ears! This craft is toddler-friendly, easy to customize, and perfect for playtime or Easter photos. Bonus? It’s an excuse to break out the glitter.
What You’ll Need:
- Cardstock or paper plates (for the ears)
- Scissors, glue, and tape
- Markers, stickers, or glitter (for decorating)
- Cotton balls (for a fluffy touch)
- Headband or ribbon (to wear the ears)
How to Make It:
- Cut two long ear shapes from cardstock or a paper plate. Want a layered look? Cut smaller inner ear shapes from colored paper and glue them onto the bigger ones.
- Let your toddler go wild decorating the ears. Stickers, markers, a sprinkle of glitter—anything goes!
- Glue cotton balls to the base or outline of the ears to make them extra fluffy.
- Attach the ears to a headband using tape or glue. No headband? No problem! Make a paper headband by cutting a long strip of cardstock and securing it around your toddler’s head.
- Once dry, pop them on and watch your little bunny hop all over the house!
Pro Tip: Use pastel-colored paper or patterned designs for a festive spring look. Let your toddler pick their colors—because every bunny has their own style!
Bunny Toddler Art
 Bunny Footprint Art – Instagram Attribution: @thegingypants


Let’s be real—making art with toddlers is mostly about the memories (and a little bit about the mess). This bunny handprint or footprint project is adorable, easy, and makes the perfect keepsake. You’ll want to hold onto this one for years!
What You’ll Need:
- Construction paper (any spring color)
- White paint and a brush
- Cotton balls (for a fluffy tail)
- Markers (for the bunny face)
- Pink paint (for the ears and paws)
How to Make It:
- Cover the table with paper or plastic to keep cleanup easy (because let’s be honest, toddlers and paint are a bold combo).
- Pour white paint into a shallow dish and have your toddler dip their hand or foot into the paint. Help them press it onto construction paper to make the bunny shape.
- Once the print dries, turn it into a bunny! Use pink paint for the ears and paws, then add whiskers and a face with a marker.
- For the cutest finishing touch, glue a cotton ball tail onto the bunny print.
- Let the masterpiece dry completely, then hang it on the fridge or give it as a sweet Easter gift!
Pro Tip: Write the date on the artwork so you can always remember just how tiny those little hands and feet were. One day, you’ll look back and wonder how they grew so fast!
Bunny Mask Crafts
 Painted Bunny Mask – Instagram Attribution: @playeatcleanrepeat


Nothing says Easter fun like a bunny mask made by little hands! This easy, mess-friendly craft gives toddlers a chance to get creative while making something they can actually wear. With a paper plate, some colors, and a few fun details, they’ll have their own custom bunny look—complete with fluffy whiskers and a cute little nose. Whether they’re hopping around the house, playing dress-up, or posing for Easter photos, this craft is sure to bring big smiles.
What You’ll Need
- Paper plates (for the mask)
- Markers or paint (for decorating)
- Elastic string (to wear the mask)
- Pipe cleaners (for whiskers)
- Glue (to attach decorations)
- Scissors (to cut the mask shape)
- Extras: Pom-poms, cotton balls, stickers, glitter, or faux flowers for extra cuteness
How to Make It
- Cut out the mask shape – Start with a paper plate and cut out two large eye holes. If you want big bunny ears, cut them from cardstock and attach them to the top of the mask.
- Add some color – Let your toddler paint or color their bunny however they like. Bright pink? Polka dots? A rainbow bunny? Anything goes!
- Make the whiskers – Glue pipe cleaners to each side of the mask. Bonus fun: let your toddler bend and twist them into shape!
- Add the nose – Stick a pom-pom or cotton ball in the center for the bunny’s cute little nose.
- Make it wearable – Punch a hole on each side of the mask, then tie an elastic string to fit snugly around your child’s head.
- Final touches – Stick on glitter, stickers, or faux flowers to make it extra festive. The more creative, the better!
Pro Tip:
Want a fluffy bunny look? Use cotton balls to outline the mask for a soft, furry effect.
Once their mask is ready, all that’s left to do is hop around and show it off!
Easter Egg Tissue Paper Craft
 Easter Egg Tissue Paper Close Up – Instagram Attribution: @inspiremyplay


This simple and colorful craft is perfect for little hands and makes a cheerful Easter decoration for your home. With just a few basic supplies, toddlers can create vibrant, stained-glass-style Easter eggs that look beautiful when hung in the sunlight. It’s not just fun—it also helps toddlers practice fine motor skills as they glue and layer tissue paper.
What You’ll Need
- Egg-shaped cutouts (sturdy paper or clear contact paper)
- Tissue paper in assorted colors
- Glue or a glue stick
- Small brush (for spreading glue)
- Scissors
- String or tape (for hanging)
How to Make It
- Set up a workspace – Cover the table with newspaper or a plastic tablecloth to keep things tidy.
- Prepare the materials – Cut tissue paper into small squares or strips ahead of time for easy use.
- Decorate the egg – Help your toddler brush glue onto the egg cutout, then let them stick tissue paper pieces all over. Layering different colors creates a fun, textured effect.
- Let it dry – Once the egg is fully covered, trim any overhanging tissue paper for a clean finish.
- Hang and admire – Use string or tape to display the eggs on windows, where the sunlight will bring out their colors beautifully.
Pro Tip:
For a mess-free version, use clear contact paper instead of glue! Just peel off the backing, and your toddler can press tissue paper pieces directly onto the sticky surface. These eggs also make a cute Easter garland or a fun fridge display!
Easter Cookie Decorating with Toddlers
 Easter Cookie Decorating with Toddlers – Instagram Attribution: @justbecooking

Who says crafting has to stop at paper and glue? Decorating cookies is a fun (and delicious) way to celebrate Easter with toddlers. Using pre-baked cookies and easy-to-handle decorating tools, little ones can create their own colorful and festive treats without too much mess. These cookies are perfect for snacking, gifting, or just making sweet memories together!
What You’ll Need
- Pre-baked cookies in Easter shapes (bunnies, eggs, carrots, etc.)
- Icing in squeeze bottles or piping bags (pastel colors work great!)
- Sprinkles and mini candy decorations
- Small bowls or trays (to keep toppings organized)
How to Make It
- Set up a decorating station – Place cookies on a large tray or table, and organize toppings in small bowls for easy access.
- Let them get creative – Show your toddler how to gently squeeze icing onto the cookies, then let them decorate however they want. Expect some masterpieces… and some icing-covered fingers!
- Add the fun toppings – Hand them sprinkles, edible glitter, or mini candies to finish off their designs.
- Let the cookies set – Allow them to sit for a few minutes so the icing can firm up before serving (or eating right away—no judgment here!).
Pro Tip:
Use larger cookies with simple shapes (like circles or ovals) so toddlers can decorate easily. To keep cleanup quick, line the table with parchment paper and keep wet wipes nearby for sticky fingers.
The best part? Once the cookies are ready, the only thing left to do is enjoy them!
Paper Bag Bunny Puppets
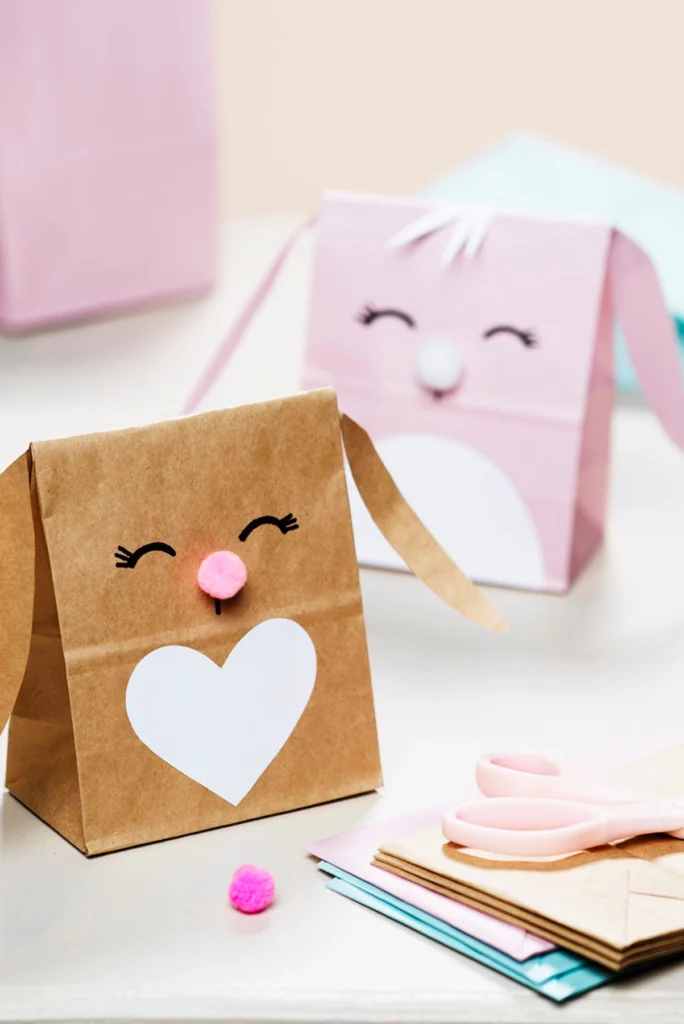
There’s something extra fun about a craft that doubles as a toy—and that’s exactly what makes these paper bag bunny puppets such a hit with toddlers. This easy project lets little ones decorate their own bunny friends, adding floppy ears, playful faces, and whatever silly details their imagination dreams up. Once they’re done, these adorable bunnies turn into puppets, perfect for storytelling, pretend play, or hopping into an Easter parade around the house!
What You’ll Need
- Brown or white paper bags
- Markers or crayons
- Googly eyes (or just draw them on!)
- Glue
- Pink or white pom-poms (for a cute bunny nose)
- Craft paper (for ears and extra decorations)
- Scissors
How to Make It
- Pick the bunny’s face – The bottom flap of the bag makes the perfect bunny head, while the open side can be the body.
- Make the ears – Cut two long bunny ears from craft paper and glue them to the top of the bag. Want extra floppy ears? Bend them slightly at the base before gluing!
- Add the face – Let your toddler draw a face with markers or crayons, or glue on googly eyes, a pom-pom nose, and whiskers made from small strips of paper or pipe cleaners.
- Dress it up – Add fun extras like a paper heart belly, stickers, or even a little bowtie to make each bunny unique.
- Bring it to life – Once everything is dry, your toddler can slip their hand inside and start bouncing their bunny around!
Pro Tip:
Turn this into storytime fun! Have your toddler name their bunny, make up a little adventure, or put on a mini puppet show. Whether it’s a bunny tea party or a great carrot heist, these puppets are made for playtime magic!
Wrapping Up the Easter Fun
These DIY Easter crafts aren’t just about glue and paper—they’re about making memories, sparking creativity, and filling your home with holiday joy. From colorful paper crafts to sweet edible treats, every little project is a chance to spend time with your toddler and soak in the fun of the season.
Got a free afternoon? Try a few different projects and mix things up! Only have a few minutes? Even a quick craft can bring big smiles. The best part? No rules, no stress—just a whole lot of Easter fun!
We’d love to see your little one’s creations! Share their adorable masterpieces with us, or save this blog for later inspiration as you plan your Easter celebrations. Let’s make this holiday full of laughter, creativity, and memories that stick around long after the Easter baskets are empty.
Happy crafting and Happy Easter!
FAQ
How to Make Easter Fun for a Toddler?
Easter can be made enjoyable for a toddler with age-appropriate activities that engage their senses and encourage exploration. Some ideas include:
- Easter egg hunts using large plastic eggs filled with non-toxic surprises.
- Simple crafts like decorating paper eggs, making bunny masks, or using stickers.
- Outdoor activities such as a toddler-friendly scavenger hunt with colorful items.
- Sensory play with Easter-themed bins filled with dyed pasta, cotton balls, or textured toys.
- Reading Easter-themed books with bright illustrations and simple stories.
What Can I Do for My 2-Year-Old for Easter?
For a 2-year-old, focus on activities that are safe, engaging, and easy to understand:
- Egg decorating with stickers or mess-free painting techniques.
- A soft Easter egg hunt using fabric eggs or large plastic eggs with simple surprises.
- Bunny hop races with easy jumping or walking activities.
- Playdough Easter shapes using cookie cutters to create bunnies and eggs.
- Reading Easter stories with interactive elements like lift-the-flap books.
What Is the Easter Game for 3-4 Year Olds?
Popular Easter games for children aged 3-4 include:
- Easter Egg Hunt – Hiding eggs in an easy-to-find area with small surprises inside.
- Bunny Hop Relay – Kids take turns hopping like bunnies in a short race.
- Pin the Tail on the Bunny – A simple adaptation of the classic “Pin the Tail on the Donkey.”
- Egg and Spoon Race – A toddler-friendly version using plastic eggs and large spoons.
- Color Sorting Egg Game – Matching colorful plastic eggs to corresponding baskets.
What Is the Montessori Easter Activity?
Montessori Easter activities emphasize hands-on learning, independence, and sensory engagement. Some activities include:
- Egg Transfer with Tongs – Using small tongs to move plastic eggs from one basket to another.
- Matching Eggs by Color or Size – Encouraging color recognition and fine motor skills.
- Sorting and Counting Jelly Beans – Using a small tray to separate and count (non-edible alternatives like beads can be used).
- Nature-Based Egg Hunt – Searching for natural items like pinecones or leaves alongside plastic eggs.
- Watercolor Egg Painting – Using natural pigments and gentle brushstrokes to decorate eggs.
What Do You Stuff Easter Eggs With for Toddlers?
For toddlers, Easter egg fillers should be safe, non-toxic, and age-appropriate. Ideas include:
- Small toys like finger puppets, mini cars, or bath toys.
- Stickers with Easter or animal themes.
- Bubbles in spill-proof containers.
- Soft snacks like puffs or toddler-friendly crackers.
- Mini playdough containers or homemade dough in small portions.
- Animal figurines or stacking blocks.
- Colorful socks or small accessories like wristbands.
What Can I Give My Kids for Easter Instead of Candy?
For a candy-free Easter, consider gifts that are fun, educational, or practical:
- Easter-themed books with colorful illustrations.
- Art supplies like crayons, markers, stickers, and coloring books.
- Outdoor toys such as chalk, jump ropes, or bubble wands.
- Gardening kits with child-friendly tools and seeds.
- Pajamas or holiday-themed clothing.
- Small puzzles or activity books for quiet play.
- Bath toys or sensory play items like water beads.
- Reusable snack containers with toddler-friendly treats.